How to create a RESTful API with Prisma and Oak
Prisma has been one of our top requested modules to work with in Deno. The demand is understandable, given that Prisma’s developer experience is top notch and plays well with so many persistent data storage technologies.
We’re excited to show you how to use Prisma with Deno.
In this How To guide, we’ll setup a simple RESTful API in Deno using Oak and Prisma.
Let’s get started.
View source or check out the video guide.
Setup the application
Let’s create the folder rest-api-with-prisma-oak and navigate there:
mkdir rest-api-with-prisma-oak
cd rest-api-with-prisma-oak
Then, let’s run prisma init with Deno:
deno run --allow-read --allow-env --allow-write npm:prisma@^4.5 initThis will generate
prisma/schema.prisma.
Let’s update it with the following:
generator client {
  provider = "prisma-client-js"
  previewFeatures = ["deno"]
  output = "../generated/client"
}

datasource db {
  provider = "postgresql"
  url      = env("DATABASE_URL")
}

model Dinosaur {
  id          Int     @id @default(autoincrement())
  name        String  @unique
  description String
}
Prisma should also have generated a .env file with DATABASE_URL. Let’s
assign DATABASE_URL to a PostreSQL connection string. In this example, we’ll
use a free PostgreSQL database from Supabase.
Next, let’s create the database schema:
deno run -A npm:prisma@^4.5 db pushAfter that’s complete, we’ll need to generate a Prisma client for Data Proxy:
deno run -A --unstable npm:prisma@^4.5 generate --data-proxySetup Prisma Data Platform
In order to use Prisma Data Platform, we’ll have to create and connect a GitHub repo. So let’s initialize the repository, create a new GitHub repo, add the remote origin, and push the repo.
Next, sign up for a free Prisma Data Platform account.
Click New Project and select Import a Prisma Repository.
It’ll ask for your PostgreSQL connection string, which you have in your .env.
Paste it here. Then click Create Project.
You’ll receive a new connection string that begins with prisma://. Let’s grab
that and assign it to DATABASE_URL in your .env file, replacing your
PostgreSQL string from Supabase.
Next, let’s create a seed script to seed the database.
Seed your Database
Create ./prisma/seed.ts:
touch prisma/seed.tsAnd in ./prisma/seed.ts:
import { Prisma, PrismaClient } from "../generated/client/deno/edge.ts";
import { config } from "https://deno.land/std@0.163.0/dotenv/mod.ts";

const envVars = await config();

const prisma = new PrismaClient({
  datasources: {
    db: {
      url: envVars.DATABASE_URL,
    },
  },
});

const dinosaurData: Prisma.DinosaurCreateInput[] = [
  {
    name: "Aardonyx",
    description: "An early stage in the evolution of sauropods.",
  },
  {
    name: "Abelisaurus",
    description: "Abel's lizard has been reconstructed from a single skull.",
  },
  {
    name: "Acanthopholis",
    description: "No, it's not a city in Greece.",
  },
];

/**
 * Seed the database.
 */

for (const u of dinosaurData) {
  const dinosaur = await prisma.dinosaur.create({
    data: u,
  });
  console.log(`Created dinosaur with id: ${dinosaur.id}`);
}
console.log(`Seeding finished.`);

await prisma.$disconnect();
We can now run seed.ts with:
deno run -A prisma/seed.tsAfter doing so, your Prisma dashboard should show the new dinosaurs:

Create your API routes
We’ll use oak to create the API routes. Let’s keep
them simple for now.
Let’s create a main.ts file:
touch main.tsThen, in your main.ts file:
import { PrismaClient } from "./generated/client/deno/edge.ts";
import { Application, Router } from "https://deno.land/x/oak@v11.1.0/mod.ts";
import { config } from "https://deno.land/std@0.163.0/dotenv/mod.ts";

const envVars = await config();

/**
 * Initialize.
 */

const prisma = new PrismaClient({
  datasources: {
    db: {
      url: envVars.DATABASE_URL,
    },
  },
});
const app = new Application();
const router = new Router();

/**
 * Setup routes.
 */

router
  .get("/", (context) => {
    context.response.body = "Welcome to the Dinosaur API!";
  })
  .get("/dinosaur", async (context) => {
    // Get all dinosaurs.
    const dinosaurs = await prisma.dinosaur.findMany();
    context.response.body = dinosaurs;
  })
  .get("/dinosaur/:id", async (context) => {
    // Get one dinosaur by id.
    const { id } = context.params;
    const dinosaur = await prisma.dinosaur.findUnique({
      where: {
        id: Number(id),
      },
    });
    context.response.body = dinosaur;
  })
  .post("/dinosaur", async (context) => {
    // Create a new dinosaur.
    const { name, description } = await context.request.body("json").value;
    const result = await prisma.dinosaur.create({
      data: {
        name,
        description,
      },
    });
    context.response.body = result;
  })
  .delete("/dinosaur/:id", async (context) => {
    // Delete a dinosaur by id.
    const { id } = context.params;
    const dinosaur = await prisma.dinosaur.delete({
      where: {
        id: Number(id),
      },
    });
    context.response.body = dinosaur;
  });

/**
 * Setup middleware.
 */

app.use(router.routes());
app.use(router.allowedMethods());

/**
 * Start server.
 */

await app.listen({ port: 8000 });
Now, let’s run it:
deno run -A main.tsLet’s visit localhost:8000/dinosaurs:

Next, let’s POST a new user with this curl command:
curl -X POST http://localhost:8000/dinosaur -H "Content-Type: application/json" -d '{"name": "Deno", "description":"The fastest, most secure, easiest to use Dinosaur ever to walk the Earth."}'And in your Prisma dashboard, you should see a new row:
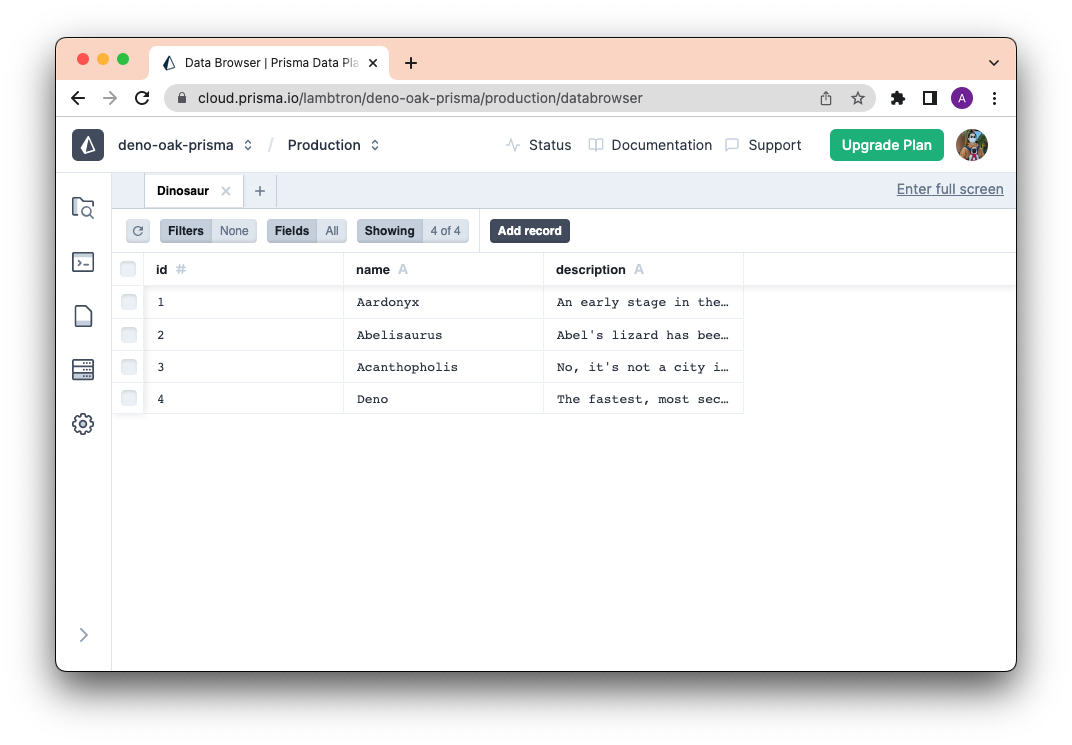
Nice!
What’s next?
Building your next app will be more productive and fun with Deno and Prisma, since both technologies deliver an intuitive developer experience with data modeling, type-safety, and robust IDE support.
If you’re interested in connecting Prisma to Deno Deploy, check out this awesome guide.